Hi, Antony here, with what has proved to be my longest project yet, but also
the most enjoyable. For this mixed media project I turned a coffee jar into a
Fairy House.... the magic came from Katy Sue Designs. Most crafters
probably know them for Flower Soft®, which is a fine decorative embellishment
that you sprinkle onto your projects to replicate tiny flowers. Well a few years
back they started to produce the most amazingly detailed moulds...
what's more they are actually designed and made right here in the UK
at their factory in South Sheilds!
Although most people use these to create decorations for cakes, they can be
used to great effect within mixed media and card making projects too!


For this project I have used: An old Douwe Egberts coffee jar, A door
cutting die from Tonic Studios a petal cutting die from Studio Lights,
various moulds from Katy Sue Designs, Polyfilla,
Viva Decor Inka Gold craft polish
Fimo clay in various colours decorative pebbles, Flower Soft® (Sweet Pea)
from Katy Sue Designs, gilding wax and a string of tiny lights.
cutting die from Tonic Studios a petal cutting die from Studio Lights,
various moulds from Katy Sue Designs, Polyfilla,
Viva Decor Inka Gold craft polish
Fimo clay in various colours decorative pebbles, Flower Soft® (Sweet Pea)
from Katy Sue Designs, gilding wax and a string of tiny lights.

Step 1 Firstly I cleaned a coffee and then made a hole in it using a drill.
I stuck some masking tape over the place I wanted to drill the hole, to
to prevent the drill from sliding. I turned set the drill on to a slow
speed and started drill into the glass.
to prevent the drill from sliding. I turned set the drill on to a slow
speed and started drill into the glass.

Step 2 I placed the string of lights inside the jar and then pull through
all but 2 of the lights and the battery pack with the on off switch on.
This will make the process of turning the lights on and off a lot easier.
This will make the process of turning the lights on and off a lot easier.

Step 3 The next step was to cut myself a door using a die from Tonic Studios.
I then stuck this to the jar using a thin coat of silicone glue and held it
in place using masking tape. I used some decorative pebbles and
formed an arch round the door, I used Polyfilla to stick these to the jar.
in place using masking tape. I used some decorative pebbles and
formed an arch round the door, I used Polyfilla to stick these to the jar.


Step 3 Working with the string of lights, I placed them round the
jar, keeping them in place with masking tape to start with and applying
Polyfilla to hold them in place. This process took quite a while, as you
can only really work on small sections at a time, because you have
to allow the Polyfilla to dry.

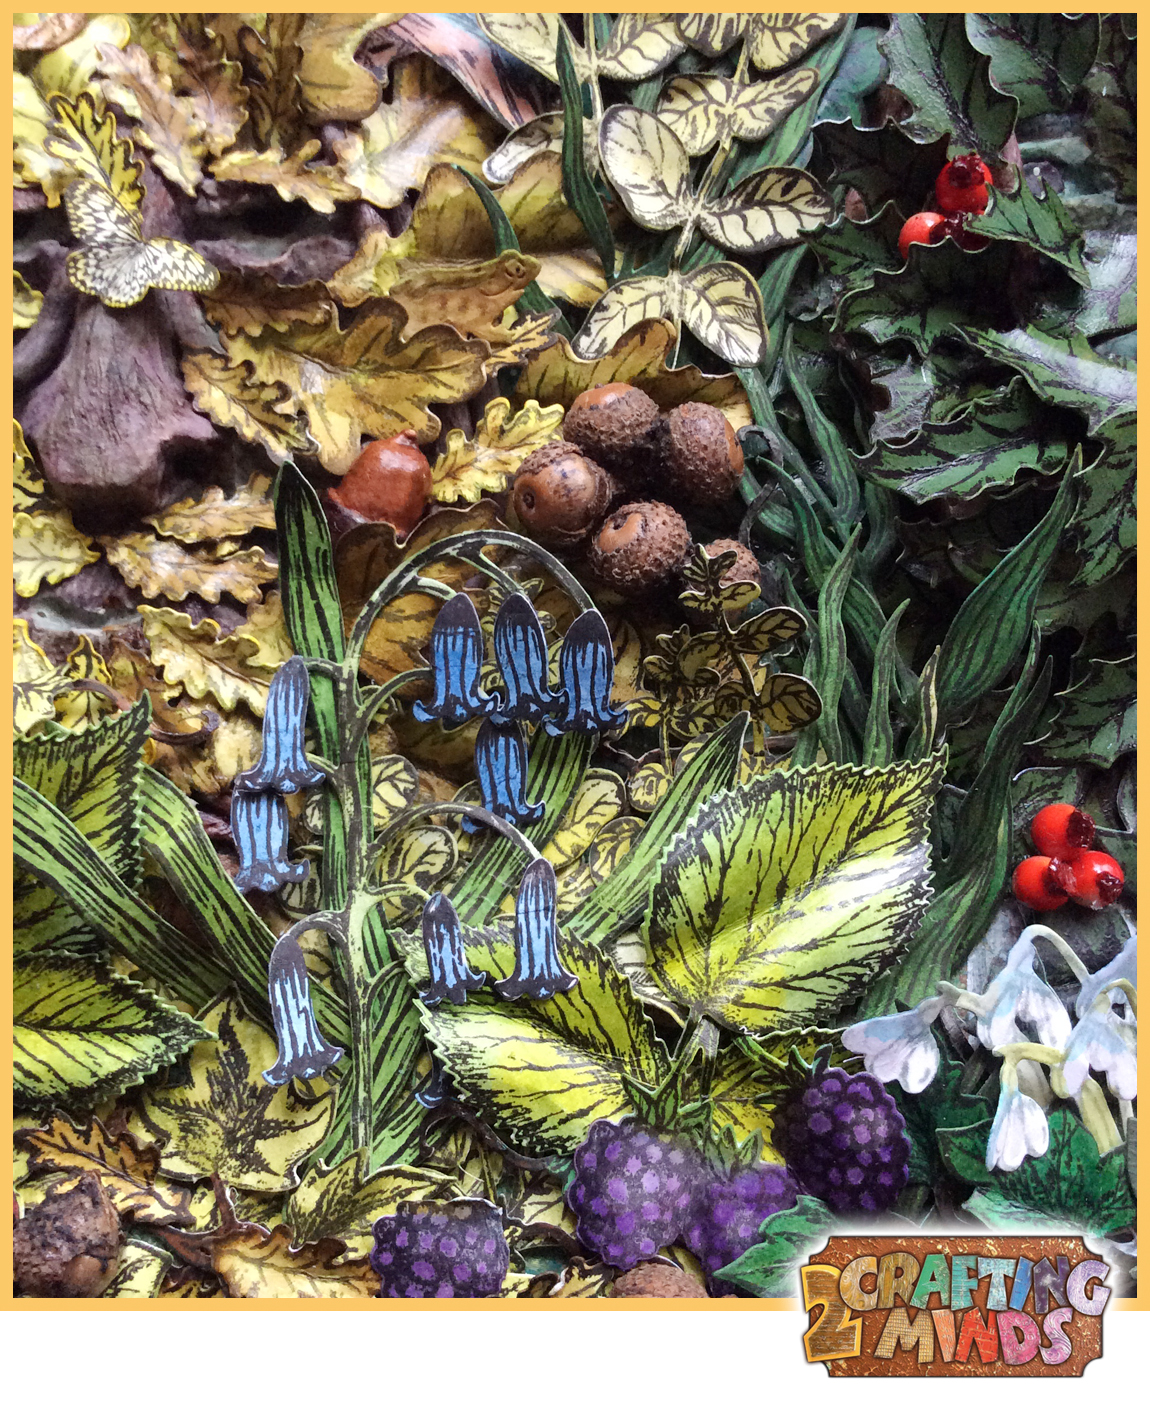
Step 4 Next step was to start working with the moulds from
Katy Sue Designs. For my project I have used
For my project I used a polymer oven bake clay such as Fimo.


To use the moulds I rolled up a small amount of the Fimo clay and
then pressed it into the moulds using a round ended metal tool.
I then pressed the clay flush to the level of the outer part
of the mould and then gently eased the clay out. Once I had made
a large amount of the leaves and flowers, I baked them in the
oven at 110°c for about 5 to 10 minutes.
For the clock and hands, I left the clay in the moulds and baked
them. After about 10 minutes I took them out of the oven and let
them cool down before removing the moulded Fimo pieces. As you
can see from the close up photos the detail on them is amazing!


Step 5 To make the roof I used some 1mm thick cardboard, old
cereal boxes are perfect for this. I used a petal die, with embossing
detail for the tiles. Firstly I drew round a plate and then made a flat
cone out of it. I then started to add the petal tiles, starting at the
bottom and working my way up the roof.
To cover the top part I used a circular die and again made a fairly
flat cone and stuck it in place.
flat cone and stuck it in place.
Once all the glue was dry, I painted it using Viva Decor
Inka Gold craft polish. I used three colours, a deep pink base coat,
followed by a light brushing of gold and finally a dark slate colour.
Inka Gold craft polish. I used three colours, a deep pink base coat,
followed by a light brushing of gold and finally a dark slate colour.

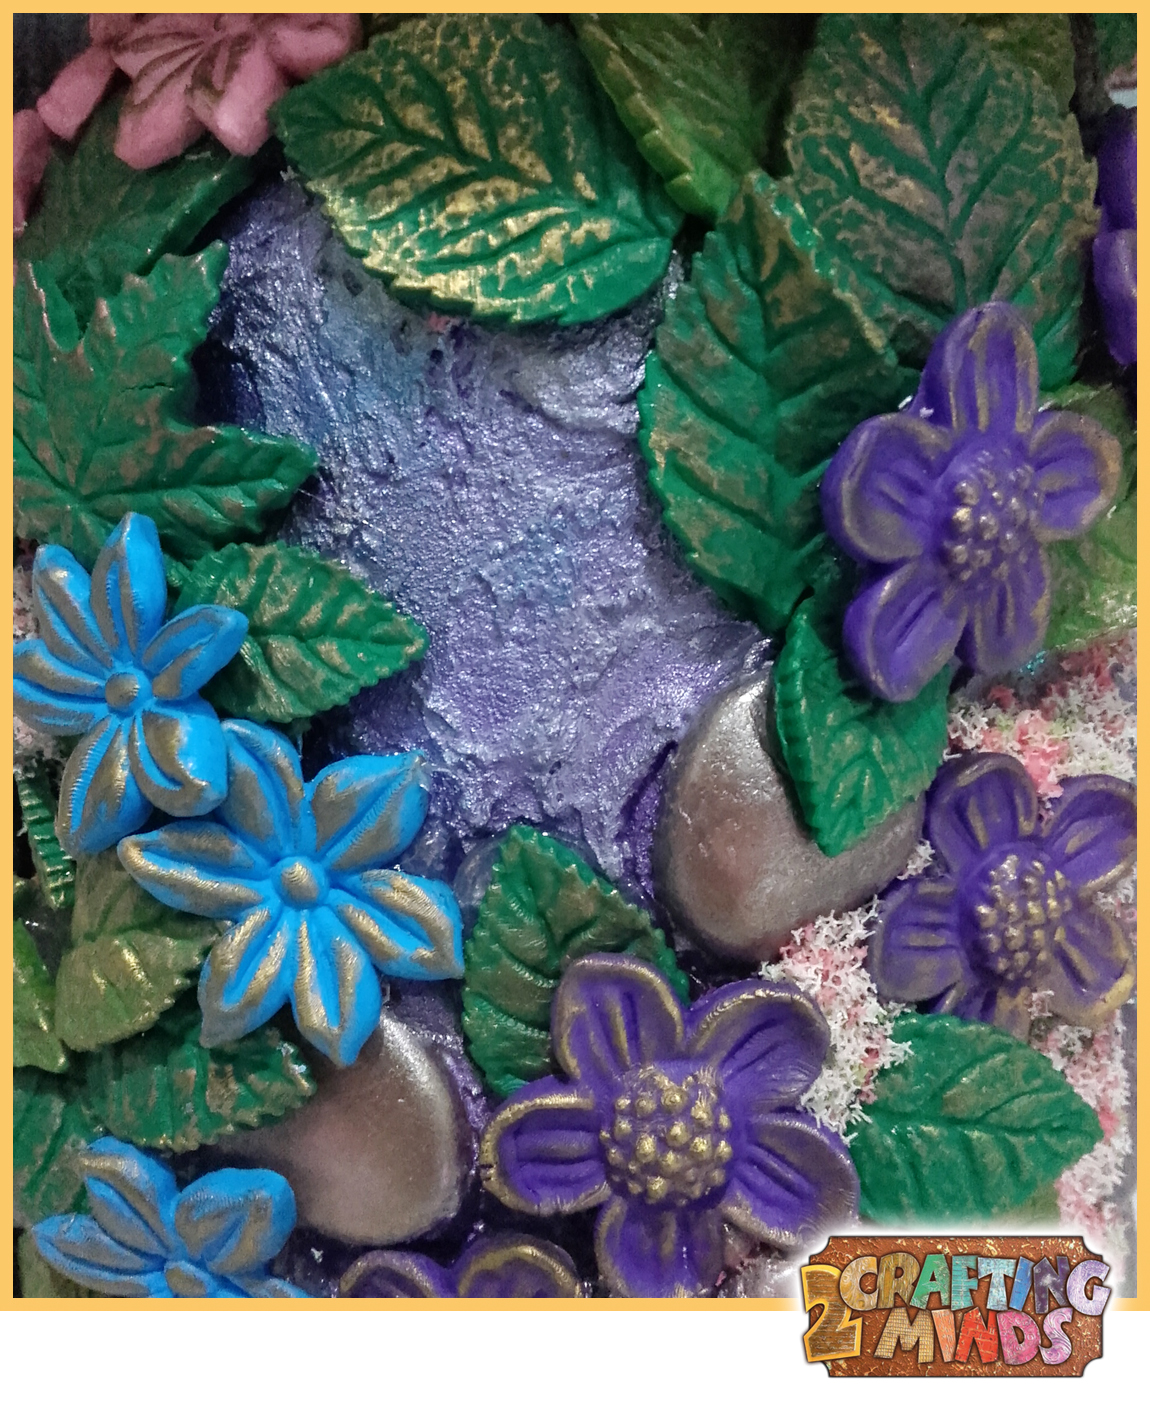
Step 5 As it was the middle of summer I decided to craft in the garden,
Not that often you can do that in the UK! I used Inka Gold craft polish to
paint the outside of the jar, over the Polyfilla. I used a purple colour and
then lightly brushed over with a gold and a slate colour to help bring out
the texture I had created with the Polyfilla. I also used a sponge with Inka
Gold on to add a bit of extra colour to the stones.
Once dry, I sealed the Inka Gold with a water based sealer.
Gold on to add a bit of extra colour to the stones.
Once dry, I sealed the Inka Gold with a water based sealer.


Step 6 Using silicone glue I went round certain areas of my project
and then sprinkled Flower Soft® from Katy Sue Designs over it.
This added a bit of colour and further texture, whilst giving the effect
of tiny flowers growing.


Step 7 Back to the moulds and a bit more baking!

Step 8 After all the baking, I started to arrange the moulded clay,
making sure not to cover up any of the tiny lights.
making sure not to cover up any of the tiny lights.
The great thing about using Fimo clay, is that after baking you can
reheat with a craft heat tool and bend the moulded clay to
shape and then place in cold water to set it's new shape.
Once I had shaped all the moulded clay, I then stuck them onto
the jar using silicone glue.
shape and then place in cold water to set it's new shape.
Once I had shaped all the moulded clay, I then stuck them onto
the jar using silicone glue.

Step 9 I stuck the roof onto the lid of the jar, firstly by using silicone glue
and then once that had set I filled in the space using Polyfilla.
Using the leaf moulded clay, I stuck them round to cover up the
Polyfilla. Once that had set I then used silicone glue and filled in
the remaining gaps and sprinkled some more Flower Soft® on.

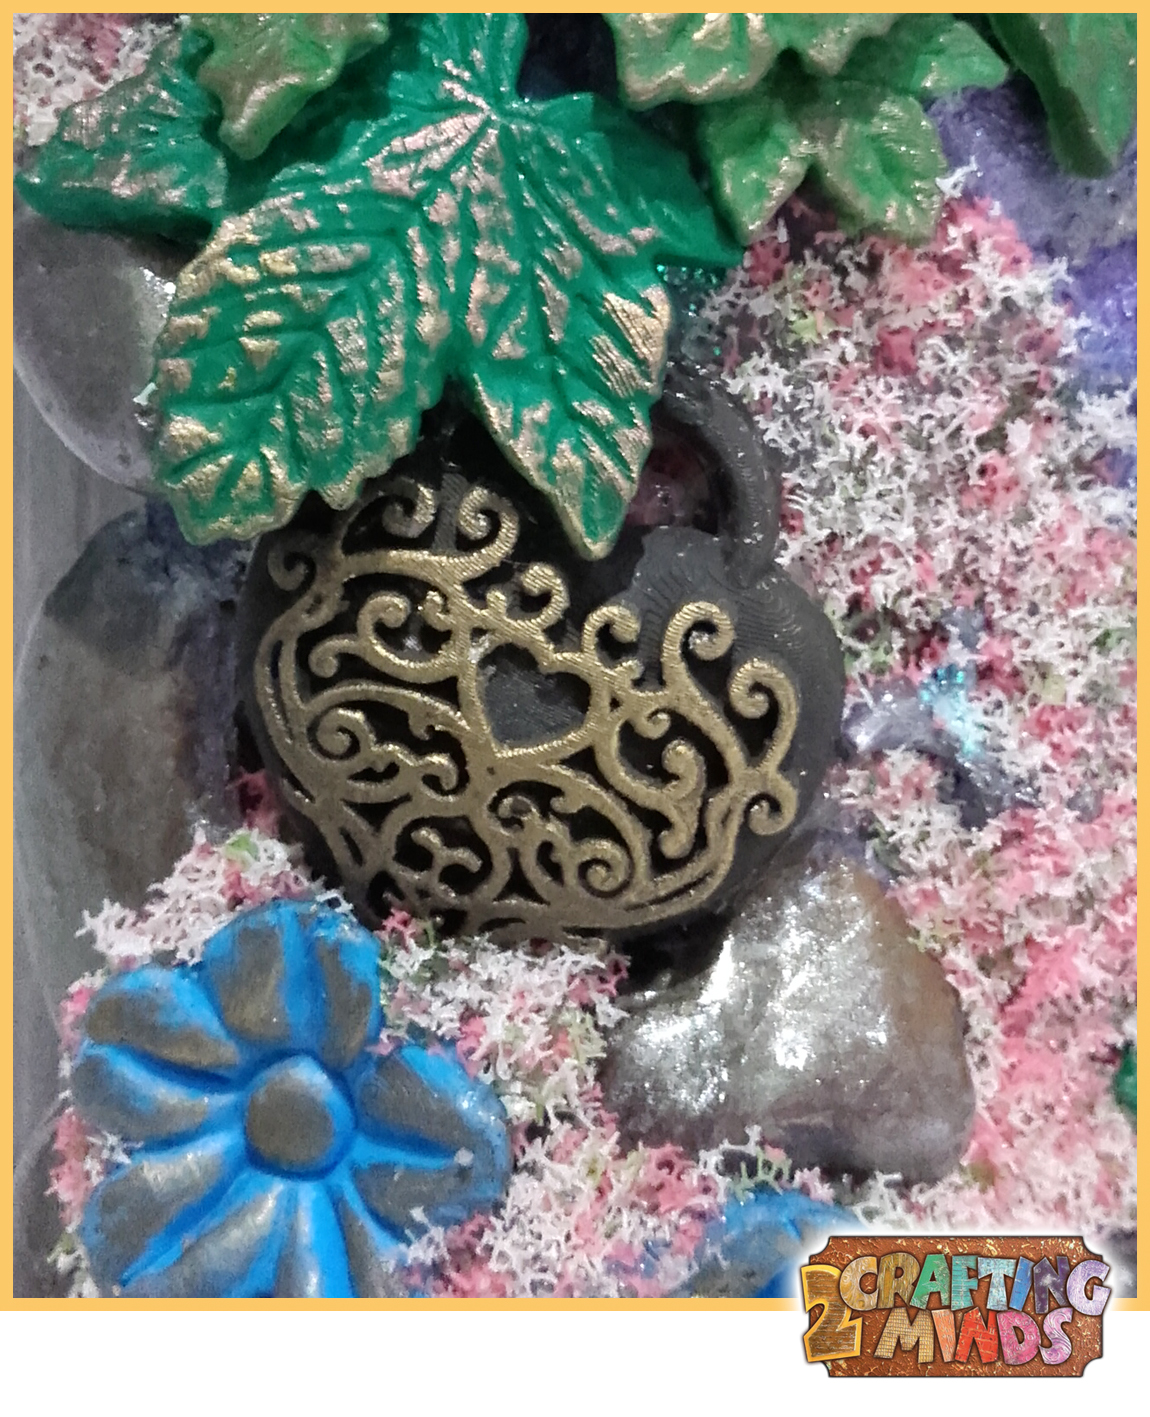
Step 10 The finishing touches included adding a touch of gilding
wax over the clay to help bring out the amazing detail. I also filled
some gaps here and there with silicone glue and Flower Soft®.

Step 11 With the main jar decorated it was time to add a few clay
flowers and leaves to the roof. Once again I used silicone glue to
hold the clay moulded pieces in place and finished off with some
gilding wax.


Last thing to do was to turn on the lights!
I hope you've enjoyed my Fairy House post and that it's inspired
you to have a go using some of the moulds available from
Katy Sue Desings.
you to have a go using some of the moulds available from
Katy Sue Desings.
Just a quick mention... as well as polymer clay such as Fimo
you can also use paper air dry clay such as Hearty Clay
or as I did concrete and of course icing to decorate your cakes!
Just be sure that if you're going to use moulds to help decorate
cake then I recommend you have a mould just for that use.
you can also use paper air dry clay such as Hearty Clay
or as I did concrete and of course icing to decorate your cakes!
Just be sure that if you're going to use moulds to help decorate
cake then I recommend you have a mould just for that use.
Until next time, Happy Crafting!
Antony